


Introduction to Resources
The Resources section allows you to share important content with your community — links, documents, videos, articles, and other files. Resources can be organized into themed sections and restricted to specific audiences based on user role, tags, industries, or programs.
Where to Find Resources
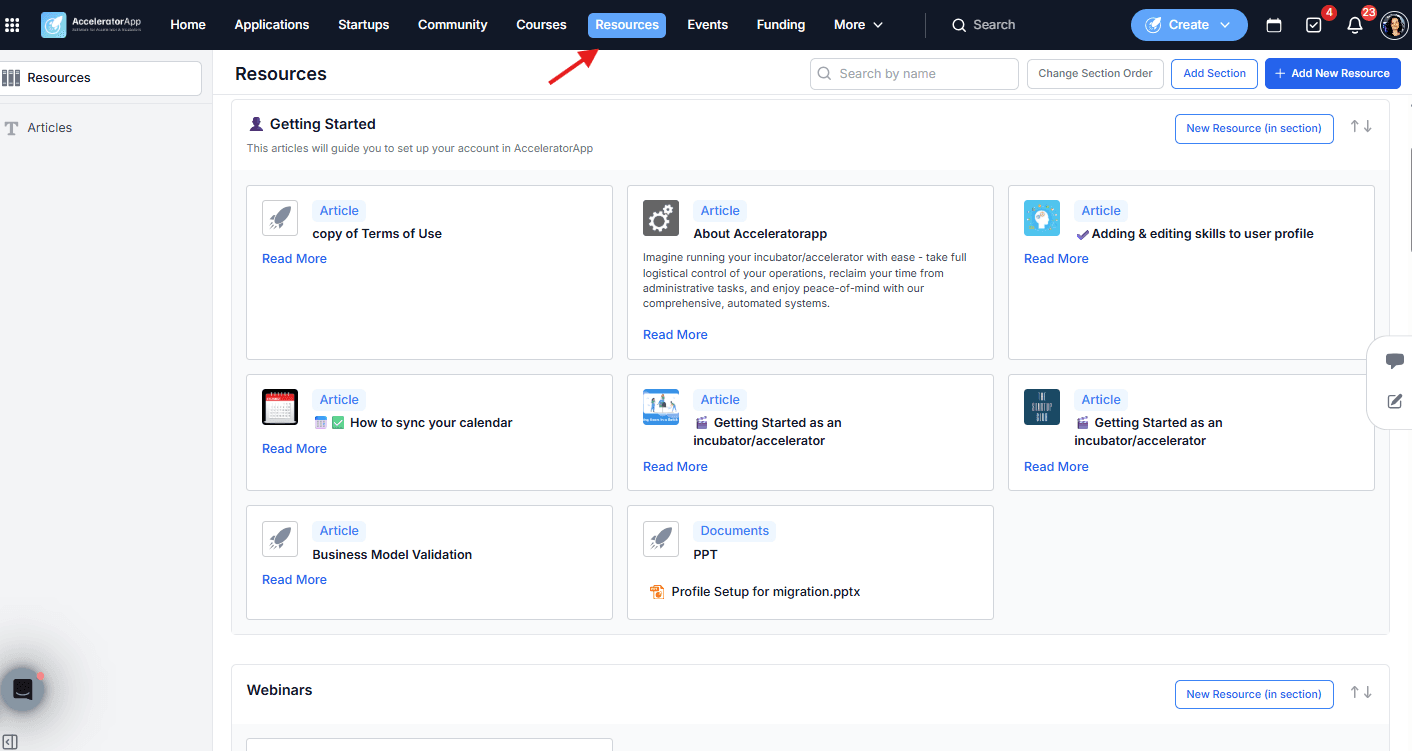
Click on Resources in the top navigation menu. From here you can search for existing resources by name, manage sections, and add new resources.
Access to create and manage resources is controlled by your Admin through User Role Settings. If you do not see the option to add or edit resources, contact your program administrator to adjust your permissions.
Step-by-Step
1. Organize Your Sections
Before adding resources, set up your sections to keep content structured by theme (e.g. Perks, Guides, Training, Tools).
- Click Add Section to create a new section and give it a name.
- Click Change Section Order to reorder your sections as needed.
2. Add a New Resource
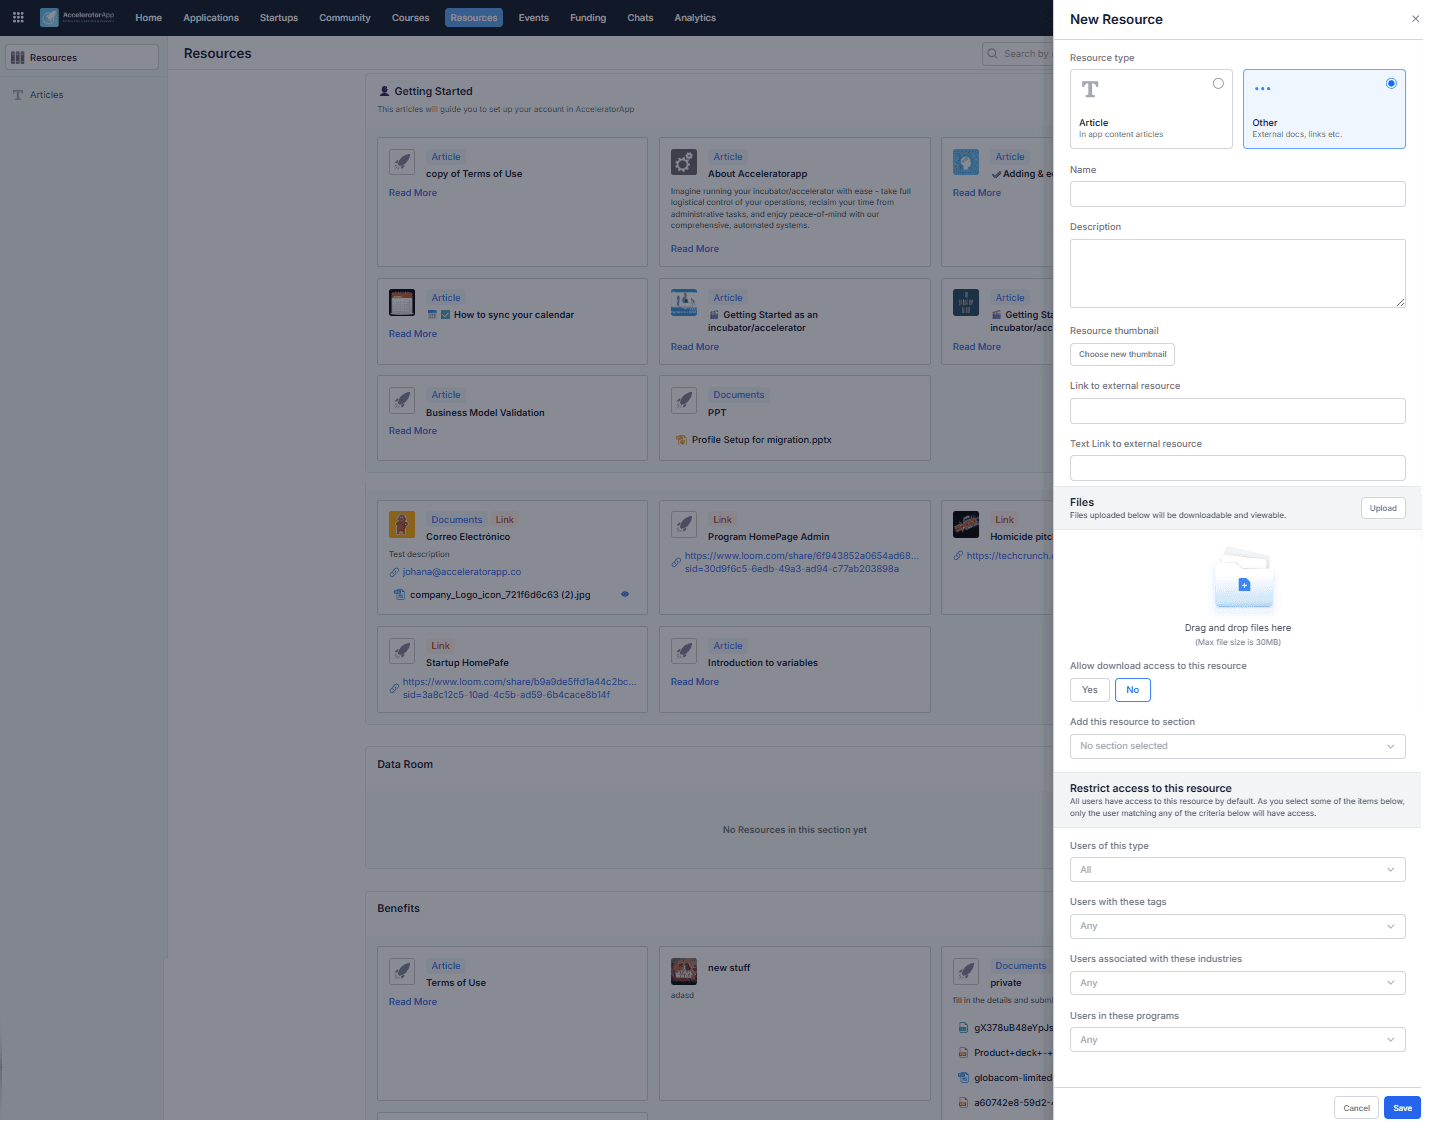
Click Add New Resource and fill in the following details:
- Type — choose between:
- Article — select an article previously created in the platform.
- Other — add an external link or upload a file (PDF, spreadsheet, Word document, etc.).
- Name — the title of the resource as it will appear to users.
- Description — a brief explanation of the resource's purpose or content.
- Thumbnail — upload a cover image for the resource card.
- Link to external resource — paste the URL if the resource is hosted externally.
- Text Link to external resource — the label displayed for the link (e.g. "Open resource" or "Visit website").
- File upload — upload a file directly if applicable.
- Allow download access — toggle Yes or No to decide whether users can download the resource.
- Section — use the Add this resource to section dropdown to assign it to the correct section.
3. Set Access Restrictions
By default, all users have access to a resource. To restrict it to a specific audience, use the Restrict access to this resource section and select from the following criteria:
- Users of this type — filter by user role.
- Users with these tags — filter by user tags.
- Users associated with these industries — filter by industry.
- Users in these programs — filter by program.
Each filter works independently — they are not combined with AND logic. Instead, they aggregate groups of users. This means that if you select a user role and a program, the resource will be visible to anyone who matches either condition, not only users who match both. A common mistake is assuming that adding more filters narrows the audience down — in fact, each filter you add may expand it by including an additional group of users.
Only users matching any of the selected criteria will be able to see the resource.
4. Save the Resource
Click Save to publish the resource and make it available to your community according to the visibility settings you defined.
Best Practices
- Set up your sections before adding resources. A clear section structure makes the Resources page easier to navigate for your community and easier to manage for your team.
- Use access restrictions intentionally. Restricting a resource to a specific program or role ensures users only see content that is relevant to them — reducing noise and improving engagement.
- Use articles for rich content. If you have guides or educational materials, create them as Articles in the platform first and then link them here — this gives you full formatting control and keeps everything centralized.
- Enable or disable download access thoughtfully. For proprietary or sensitive files, disabling downloads ensures users can only view the content within the platform.
- Keep resources up to date. Outdated links or irrelevant files reduce trust — review your resources periodically and remove or update anything that is no longer current.